vuepress
介绍
VuePress是一个静态网站生成器- 由
VuePress生成的静态网站是一个由Vue、vue-router、webpack驱动的SPA单页应用 - 构建时,会采用预渲染的机制,生成所有静态页面,所以有非常好的加载性能和
SEO - 本文大部分内容摘抄自
vuepress官网,加了一些自己的理解,明确了一些语义- 一来加深印象
- 二来方便自己查阅
安装
- 确保
node >=8 - 本地安装即可
1 | yarn add -D vuepress # 或者:npm install -D vuepress |
目录结构
1 | . |
docs是vuepress约定的目标目录(工作目录)targetDir- 路由的生成是相对于
targetDir
- 路由的生成是相对于
.vuepress目录是vuepress的配置目录docs目录下除了.vuepress文件夹以外的所有.md都将被编译为一个页面- 所有
README.md、index.md都会被编译为index.html - 上述目录对应的默认路由为
- 所有
| 文件的相对路径 | 页面路由地址 |
|---|---|
/README.md |
/ |
/guide/README.md |
/guide/ |
/config.md |
/config.html |
vuepress遵循约定大于配置原则,并且本身自带一套默认主题@vuepress/theme-blog(主要用来书写文档),所以上述的目录基本都是可选的;
scripts
- 主要提供了
1 | { |
配置
基本配置
targetDir/.vuepress/config.js是vuepress网站必须有的一个配置文件
主题配置
vuepress内置一个默认主题@vuepress/plugin-blog,就是vue官网使用的主题- 它适合用来书写技术文档
配置主题
- 配置默认主题
@vuepress/plugin-blog targetDir/.vuepress/config.js中不要指定theme字段(让其使用默认的主题),直接配置themeConfig字段即可
1 | // .vuepress/config.js |
- 默认主题的配置项可以查看
- 配置自定义主题
- 首先安装自定义主题
- 然后用
theme字段指定需要的theme主题 - 配置
themeConfig字段来控制自定义主题样式
1 | // .vuepress/config.js |
应用级配置
vuepress生成的网站其实就一个vue应用,所以可以对vue实例做一些增强- 例如使用 UI 框架
- 创建一个
.vuepress/enhanceApp.js并导出一个函数,vuepress会读取此文件
1 | // .vurepress/enhanceApp.js |
静态资源
- 每个
.md文件都会被编译成一个vue组件,里面引用到的资源会被webpack的loader处理- 例如图片资源,会被
url-loader和file-loader处理
- 例如图片资源,会被
相对路径
- 所以可以通过相对路径的形式来引用资源
- 例如如下目录,可以在
a.md中引用assets中的图片
1 | . |
路径别名
- 可以通过配置
webpack alias别名,然后使用~别名来告诉webpack加载某个资源
1 | // .vuepress/config.js |
加载依赖包中资源
- 引用资源时,可以通过
~前缀来明确地指出这是一个webpack的模块请求,这将允许你通过webpack来引用npm包中的资源
1 |  |
公共资源
- 项目级的公共资源,例如
favicon.ico,可以直接放在.vuepress/public文件夹中,它们最终会被复制到生成的静态文件夹中- 可以通过项目根路径来引用
1 |  |
- 如果网站没有部署到
根路径上,则需要设置.vurepress/config.js中的base基础路径,这个时候引用项目根路径的公共资源,就需要填写完整路径- 例如
- 项目部署到网站的
/blog目录(非根路径)下 - 所以
favicon.ico的引用路径需要调整成/blog/favicon.ico
vuepress提供了一个快捷方法来引用部署基础路径;使用$withBase来引用,vurepss会保证$withBase返回正确的路径
1 | <img :src="$withBase('/foo.png')" alt="foo"> |
markdown 常规能力
链接
vuepress中每篇文章都会生成一个链接,在md内部可以使用常规md链接跳转形式来访问
1 | // 有下面的目录 |
- 外部链接
- 所有外部链接(
http/https开头),vuepress会自动为通过OutboundLink组件添加上外部链接标识 - outside.png
- 所有外部链接(
toc、Emoji、自定义容器
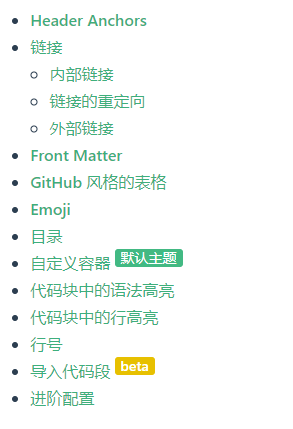
- 可以生成目录(
toc),使用emoji表情、自定义容器 toc
1 | // xxx.md // 目录 [[toc]] // emoji :tada: :100: // 自定义容器 ::: tip |
- toc.png
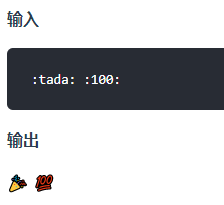
emoji
1 | // xxx.md // emoji :tada: :100: |
- emoji.png
- 自定义容器
vuepress使用vuepress-plugin-container插件实现自定义容器
1 | // xxx.md // 自定义容器 ::: tip 这是一个提示 ::: ::: warning 这是一个警告 ::: |
- tips.png
- 其他常规功能可以参考https://vuepress.vuejs.org/zh/guide/markdown.html

markdown 增强
vuepress驱动的网站,md文件除了可以用常规的md语法和特性,还能使用一些vue赋予的能力
基本原理
vuepress使用markdown-it来渲染markdown,将其编译成html,然后通过vue-loader,接着做为一个Vue组件传给vue-loader- 例子
test.md通过markdown-it编译成 html 字符串vuepress将其组装成一个vue组件- 组装好的
vue组件传递给vue-loader、结合SSR生成最终的test.html
- 所以在
vuepress驱动的网站中,可以md文件中使用vue的一些特性,例如
插值表达式
- 可以在
md中使用vue的插值表达式
1 | // xxx.md 表达式的值为{{ 1 + 1 }} // 输出 表达式的值为2 |
转义
- 由于
md中可以使用vue的插值表达式,所以在特定情况下,如果需要展示左右大括号{ },则需要使用转义
1 | ::: v-pre `{{ This will be displayed as-is }}` ::: |
内置指令
- 可以在
md中使用vue的内置指令
1 | // xxx.md |
访问网站的元数据
- 可以在
md中访问网站的元数据
1 | // xxx.md |
使用组件
.vuepress/components下的组件会被注册为全局的异步组件,可以在md文件中使用
1 | . |
- 使用组件时,始终保持
PascalCase命名风格
在标题中使用 vue 组件
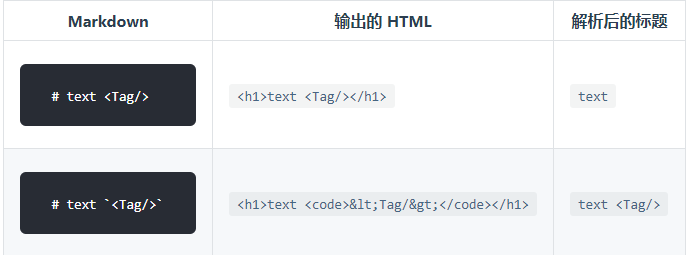
- 可以在
md的标题中使用vue组件 - markdown-vue.png
- 输出的 HTML 由
markdown-it完成。而解析后的标题由VuePress完成,用于侧边栏以及文档的标题。
注意
- 由于
vuepress会使用SSR生成静态页面 - 所以
Vue相关代码,需要确保只在beforeMount或者mounted访问浏览器 /DOM的API。 - 必要时,可以使用
ClientOnly内置组件,包裹对SSR不友好的组件,或者在合适的生命周期钩子中动态载入相关组件,保证他们能访问到 DOM API
1 |
|
markdown 插槽
<Content/>组件会保存md文件中的普通内容markdown插槽可以分发md内容,方便灵活布局
1 | // .vuepress/theme/Layout.vue |
- 注意
- 每个被分发的内容都会被包裹在
div中,并且div的class为content和slot的名字
- 每个被分发的内容都会被包裹在
样式
预处理器
vuepress项目默认采用stylus处理样式,所以内置了stylus及stylus-loader- 如果需要使用其它预处理器(
sass、scss、less、pug),可直接安装相关依赖包,vuepress已经包含相关配置,开箱即用 yarn add -D sass-loader node-sass
1 | <style lang="sass"> |
在页面使用页面级样式及脚本
- 可以直接在
md文件中添加<script>、<style>标签,这两个标签会被vuepress提取出来并当成vue单文件组件中的<style>、<script>使用,所以可能利用这个特性定义页面级样式及逻辑
1 | // xxx.md |
内置组件
- 内置组件可以直接在
md文件中使用 OutboundLink- 标识外部链接用,
vuepress会自动在外部链接后面生成这个标识
- 标识外部链接用,
ClientOnly- 标识内部组件需要访问 DOM API,不需要在服务端进行渲染
Content- 包含页面 md 的所有渲染内容
- 自定义布局(主题)时,很有用
- 具体可参考https://vuepress.vuejs.org/zh/guide/using-vue.html#content
1 | <template> |
Badge
1 | ### Badge <Badge text="beta" type="warning" /> <Badge text="默认主题" /> |
- badge.png
多语言
- 要支持多语言,首先要有翻译好的其他语言版本
md文件 - 不同语言的
md文件目录、文件名要保持完全一致
1 | docs |
- 其次,需要配置
vuepress的locales字段,来告诉不同语言环境,使用哪个目录下的md文件
1 | // .vuepress/config.js |
- 还可以为不同的语言版本使用不同的配置(需要看主题是否提供了此能力);默认主题支持对不同语言使用不同配置
1 | // .vuepress/config.js |
全局计算属性
vuepress将一些站点、页面信息注入到Vue.prototype上,所以我们可以直接在md文件、自定义vue组件中直接使用
\$site
- 包含站点的信息
1 |
|
\$page
- 包含当前页面的信息
1 |
|
\$frontmatter
$page.frontmatter的一个引用
1 | $page.frontmatter === $frontmatter // true |
\$localePath
- 当前页面的
locale路径前缀,默认值为/ - 返回
config中的base字段值?待确认
$lang、$title、$description、$themeConfig
$lang当前页面的语言,默认en-US$title当前页面<title>标签的值$description用于当前页面的<meta name="description" content="..."> 的content值$themeConfig是.vupress/config.js中的themeConfig.vupress/config.js导出的内容称为siteConfig
Front Matter
vuepress支持YAML front matterFront matter可以理解为对md文件添加一些特殊字段(元信息),用来自定义当前页面;用来增强md的表现力
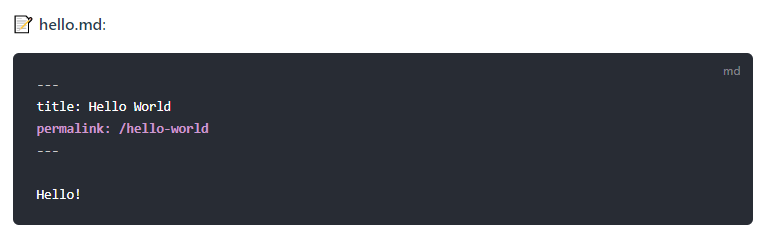
- 在
md文件中,一般开头---之间的内容为Front matter vuepress预定义了一些front matter,也可以自定义,然后使用$frontmatter来引用- front-matter.png

预定义 front matter
title- 当前页面标题
lang- 当前页面语言
description- 当前页面描述
layout- 当前页面的布局组件(默认为
Layout.vue)
- 当前页面的布局组件(默认为
permalink- 当前页面永久链接格式
metaTitle- 重写页面的 title
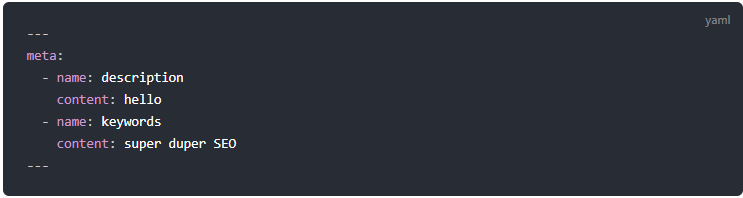
meta- 当前页面额外的
meta标签
- 当前页面额外的
- meta.png
默认主题预定义变量
- 默认主题也提供了很多预定义变量用来控制当前页面一些布局组件的展示
- 例如
navbar、sidebar等等 - 具体可参考https://vuepress.vuejs.org/zh/theme/default-theme-config.html#%E9%A6%96%E9%A1%B5
永久链接 permalink
- 如果利用
vuepress生成一个博客,那永久链接是必不可少的,为每一篇文章生成一个永久链接
配置 permalink
permalink拥有一些变量:year- 文章发布的年份 (4 数字)
:month- 文章发布的月份 (2 数字)
:i_month- 文章发布的月份 (前面不带 0)
:day- 文章发布的日份 (2 数字)
:i_day- 文章发布的日份 (前面不带 0)
:slug- 不带扩展名的文件名
:regular
1 | // .vuepress/config.js |
- 在页面中,也可以用
front matter为页面单独配置一个永久链接 - link.png
部署到 github pages
- 第一步确定,静态存放目录
- 例如
https://github.com/bryanadamss/testrepo
- 例如
- 确定仓库名
repoNametestrepo
- 配置
siteConfig.base为repoName
1 | // .vuepress/config.js |
- 设置仓库为
github pages - 编译文件
- 运行
npm run docs:build
- 运行
- 上传静态文件
- 可以通过
shell脚本上传,避免重复劳动
- 可以通过
1 |
|